Ascendoor Author Info Widget
In this section, you can Customize the Author Info Widget.
- To configure the Author Info Widget, you need to navigate from Admin Panel > Appearance > Customize > Widget > Widgets Section.
- In this Widget Section panel, you can select the section where you want to display the Author Info Widget.
- After selecting the widget section click on the Add a Widget button then select the Ascendoor Author Info Widget, the user will see the following options:
-
- Section Title: This setting allows the user to set the title for the Author Info Widget.
- Author Name: This setting allows the user to set the Author Name.
- Description: This setting allows the user to set the description of the author.
- Author Image URL: This setting allows users to upload an author image for the author info widget.
- Number of links to show: This setting allows users to add the number of social links in the section.
- Open in New Tab: You can check the checkbox if you want the social links to open in a new tab instead of the same tab.
- Social Links: Here you can add authors’ social links for easier contact.
-


Ascendoor Social Icons
In this section, you can Customize the Social Icons Widget.
- To configure the Social Icons Widget, you need to navigate from Admin Panel > Appearance > Customize > Widget > Widgets Section.
- In this section panel, you can select the section where you want to display the Social Icons Widget.
- After selecting the widget section click on the Add a Widget button then select the Ascendoor Social Icons Widget, the user will see the following options:
-
- Section Title: This setting allows the user to set the title for the first Social Icons Widget.
- Select Menu: This setting allows the user to select the social menu for this section.
-
![]()
![]()
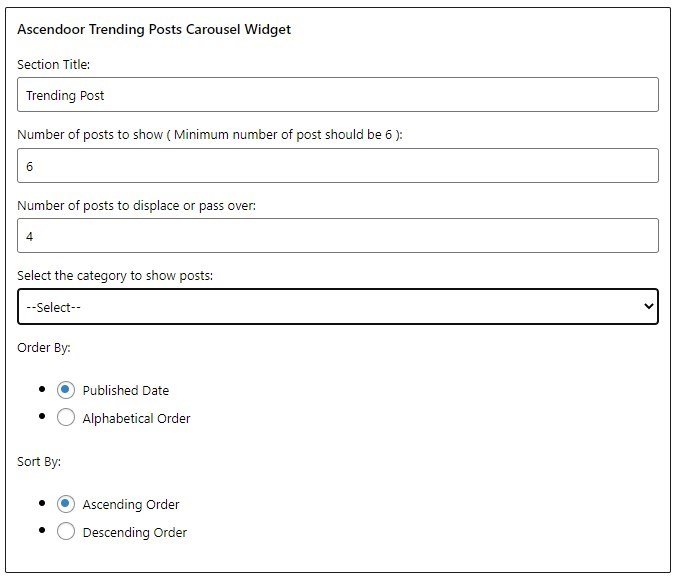
Ascendoor Trending Posts Carousel Widget
In this section, you can Customize the Posts Carousel Widget.
- To configure the Posts Carousel Widget, you need to navigate from Admin Panel > Appearance > Customize > Widget > Widgets Section.
- In this section panel, you can select the section where you want to display the Posts Carousel Widget.
- After selecting the widget section Click on the Add a Widget button then select the Ascendoor Posts Carousel Widget, the user will see the following options:
-
- Section Title: This setting allows the user to set the title for the first Posts Carousel Widget.
- Number of posts to show: This setting allows users to set the number of posts to display in the section.
- Number of posts to displace or pass over: This setting allows the user to exclude the number of posts from the selected category that the user would like to displace or pass over.
- Selecting Category: You can select the first category—select an Existing Category to display the title, featured image, and content of that selected post/page for the Posts Carousel Widget.
- Order By: This option allows users to set the order in which the posts would be displayed. Users can choose to order the posts by Published date or in alphabetical order.
-
- Published Date: This option allows the user to set the order of the posts based on the post’s published date.
- Alphabetical Order: This option allows the user to set the order of the posts based on the Alphabetical order of the post’s title.
-
- Sort By: This option allows the users to select how to sort their posts.
-
- Ascending Order: This will sort the posts in ascending order based on the order the user selects.
- Descending Order: This will sort the posts in descending order based on the order the user selects.
-
-

*Note: Click on Publish to save the changes.