How To Set The Widgets – Ascendoor Posts Grid And List Widget
In this section, you can customize the Ascendoor Posts Grid and List Widget.
- To configure the Posts Grid and List Widget, you need to navigate from Admin Panel > Appearance > Customize > Widgets> Widgets Section.
- In this section panel, you can select the section where you want to display the Posts Grid and List Widget.
- After selecting the widget section, click on the Add a Widget button, then select the Ascendoor Posts Grid and List Widget the user will see the following options:
- Section Title: This setting allows the user to set the title for the first Posts Grid and List Widget.
- View All Button: This setting allows the user to set the label for the button.
- View All Button URL: This setting allows the user to set the link for the button. *Note: if this field is empty, it will direct to the category page.
- Number of posts to displace or pass over: This setting allows the user to exclude the number of posts from the selected category that the user would like to displace or pass over.
- Selecting Category: You can select the first category – select an Existing Category to display the title, featured image, and content of that selected post/page for the Posts Grid And List Widget.
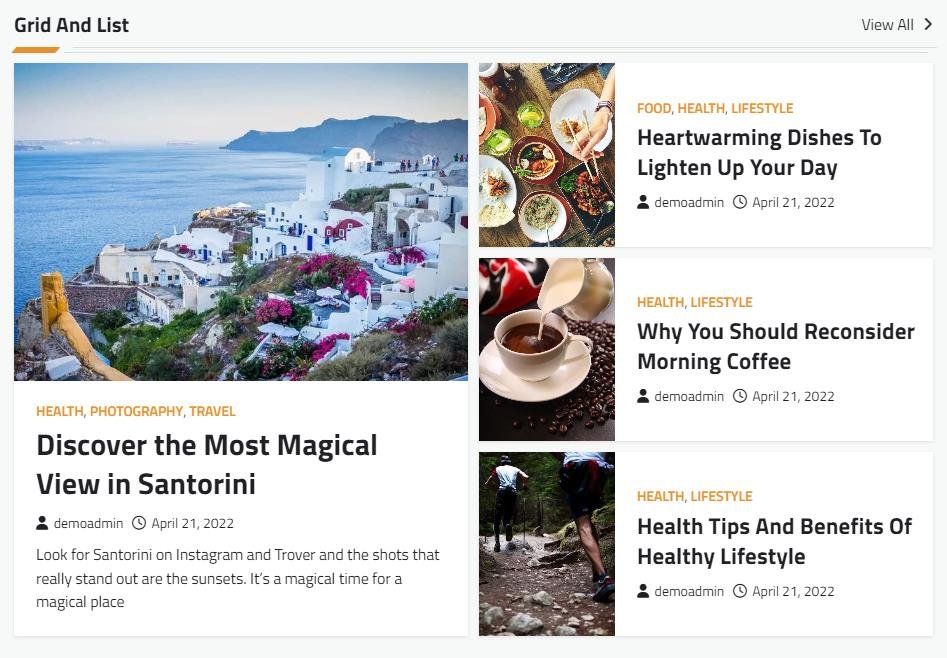

Ascendoor Posts Grid Widget
In this section, you can Customize the Ascendoor Posts Grid Widget.
- To configure the Posts Grid Widget, you need to navigate from Admin Panel > Appearance > Customize > Widget > Widgets Section.
- In this section panel, you can select the section where you want to display the Posts Grid Widget.
- After selecting the widget section Click on the Add a Widget button then select the Ascendoor Posts Grid Widget the user will see the following options:
- Section Title: This setting allows the user to set the title for the first Posts Grid Widget.
- View All Button: This setting allows the user to set the label for the button.
- View All Button URL: This setting allows the user to set the link for the button. *Note if this field is empty it will direct to the category page.
- Number of posts to displace or pass over: This setting allows the user to exclude the number of posts from the selected category that the user would like to displace or pass over.
- Selecting Category: You can select the first category – select an Existing Category to display the title, featured image, and content of that selected post/page for the Posts Grid Widget.


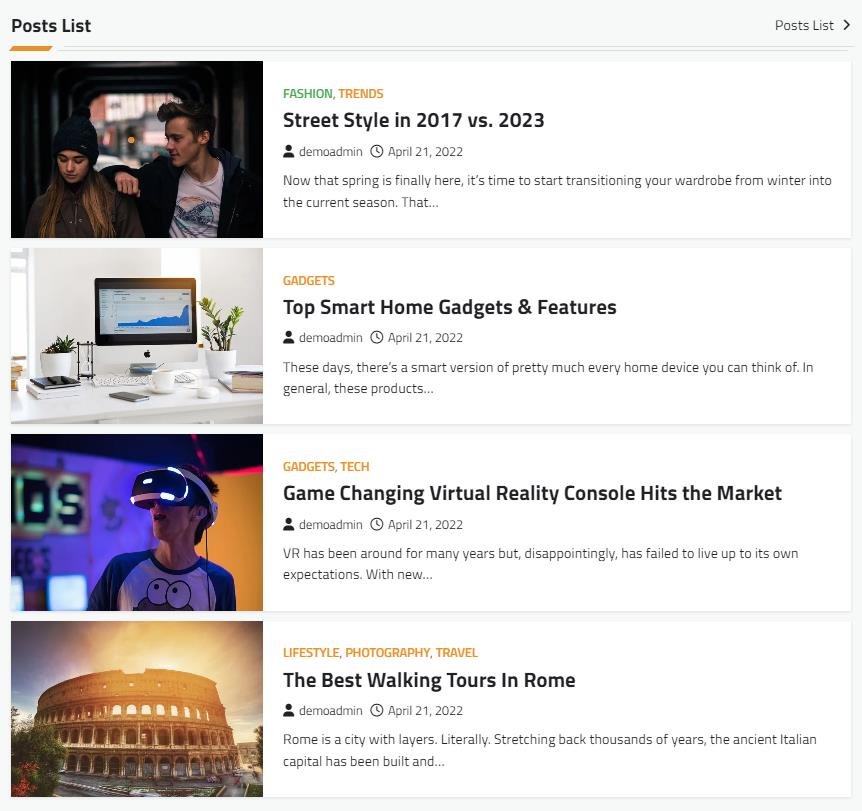
Ascendoor Posts List Widget
In this section, you can Customize the Ascendoor Posts List Widget.
- To configure the Posts List Widget, you need to navigate from Admin Panel > Appearance > Customize > Widget > Widgets Section.
- In this section panel, you can select the section where you want to display the Posts List Widget.
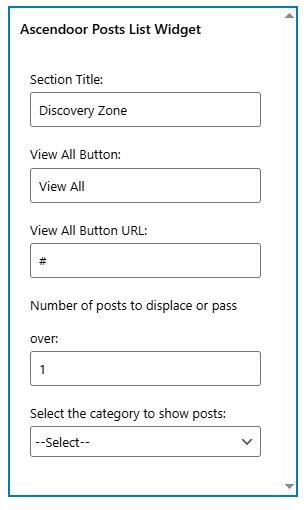
- After selecting the widget section Click on the Add a Widget button then select the Ascendoor Posts List Widget the user will see the following options:
- Section Title: This setting allows the user to set the title for the first Posts List Widget.
- View All Button: This setting allows the user to set the label for the button.
- View All Button URL: This setting allows the user to set the link for the button. *Note if this field is empty it will direct to the category page.
- Number of posts to displace or pass over: This setting allows the user to exclude the number of posts from the selected category that the user would like to displace or pass over.
- Selecting Category: You can select the first category – select an Existing Category to display the title, featured image, and content of that selected post/page for the Posts List Widget.
Ascendoor Slider Widget
In this section, you can customize the Ascendoor Slider Widget.
- To configure the Slider Widget, you need to navigate from Admin Panel > Appearance > Customize > Widgets> Widgets Section.
- In this section panel, you can select the section where you want to display the Slider Widget.
- After selecting the widget section, click on the Add a Widget button, then select the Ascendoor Slider Widget the user will see the following options:
- Section Title: This setting allows the user to set the title for the first Slider Widget.
- View All Button: This setting allows the user to set the label for the button.
- View All Button URL: This setting allows the user to set the link for the button. *Note if this field is empty, it will direct to the category page.
- Number of posts to displace or pass over: This setting allows the user to exclude the number of posts from the selected category that the user would like to displace or pass over.
- Selecting Category: You can select the first category – select an Existing Category to display the title, featured image, and content of that selected post/page for the Slider Widget.


Ascendoor Posts Small List Widget
In this section, you can Customize the Ascendoor Posts Small List Widget.
- To configure the Posts Small List Widget, you need to navigate from Admin Panel > Appearance > Customize > Widget > Widgets Section.
- In this section panel, you can select the section where you want to display the Posts Small List Widget.
- After selecting the widget section Click on the Add a Widget button then select the Ascendoor Posts Small List Widget the user will see the following options:
- Section Title: This setting allows the user to set the title for the first Posts Small List Widget.
- View All Button: This setting allows the user to set the label for the button.
- View All Button URL: This setting allows the user to set the link for the button. *Note if this field is empty it will direct to the category page.
- Number of posts to displace or pass over: This setting allows the user to exclude the number of posts from the selected category that the user would like to displace or pass over.
- Selecting Category: You can select the first category – select an Existing Category to display the title, featured image, and content of that selected post/page for the Posts Small List Widget.


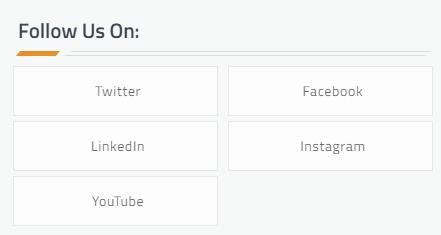
Ascendoor Social Icons
In this section, you can Customize the Social Icons Widget.
- To configure the Social Icons Widget, you need to navigate from Admin Panel > Appearance > Customize > Widget > Widgets Section.
- In this section panel, you can select the section where you want to display the Social Icons Widget.
- After selecting the widget section Click on the Add a Widget button then select the Ascendoor Social Icons Widget the user will see the following options:
- Section Title: This setting allows the user to set the title for the first Social Icons Widget.
- Select Menu: This setting allows the user to select the social menu for this section.

* Click on done and publish to save the progress. You can also drag the widgets to sort the positions.