Banner Slider Section
You can set the banner pages/posts and set different other options for the banner Slider section.
- To configure the Banner Slider Section, you need to navigate from Admin Panel > Appearance > Customize > Front Page Options > Banner Slider Section.
- In this section pane, you can Enable/Disable the Banner section to display Banner on the Frontpage otherwise disable to hide.
- Right after enabling the Banner Slider Section, you can set the following settings:
- Select a content type: page or post for the Banner section.
- Content Type: This setting allows you to select the kind of content to choose from. It contains select options (Pages, Or Post) which allow the user to select a page/post to display as a Banner
- Selecting Page/Post as Content Type allows you to select a page/post (Existing post/ page) to display the title, featured image, and content of that selected post/page as a Banner.*After selecting the desired content type as page/ post you can now set the following section for the banner:
- Content Type: This setting allows you to select the kind of content to choose from. It contains select options (Pages, Or Post) which allow the user to select a page/post to display as a Banner
- Button Label: You can set the label for the button.
- Button Link: You can set the link for the button.
- Select a content type: page or post for the Banner section.

Counter Section
In this section, you can set the counters.
- To configure the Counters section, you need to navigate from Admin Panel > Appearance > Customize > Front Page Options > Counter Section.
- You can enable the counter section to display the counter section on the front page and disable the counter section to hide.
- After enabling the counters section, the user will see the options to set:
- Background Color: This setting allows the user to set the Background Color for the Counter section.
- Number of Counters: This setting allows the user to set the number of Counters to show for the section.
- Icon: This setting allows the user to set the Icon for the counter.
- Label: This setting sets the Label for the section
- Value: This setting allows the user to set a value for the counter.
- Value Suffix: This setting allows the user to set a value Suffix for the counter.

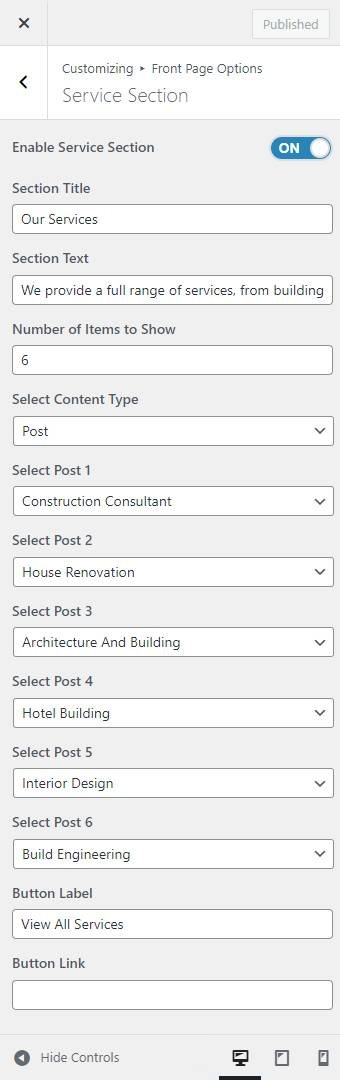
Service Section
In this section, you can set/ customize the Service section.
- To configure the Service section, you need to navigate from Admin Panel > Appearance > Customize > Front Page Options > Service Section.
- In this section panel, you can enable/Disable the Service section to display/Hide the Service Section. After enabling the Service Section, the user will see the following options:
- Section Title: This setting allows the user to set the title for the Service section.
- Section Text: In this setting, you can add a short description to display in the Service section.
- Number of items to show: This setting will include the number of posts/ pages to display.
- Select a content type: In this setting, you can select a page or post for the Service section
- Content Type: This setting allows you to select the kind of content to choose from. It contains select options (Pages, And Post) which allow the user to select a page/post to display in the Service Section.
- Selecting Pages/Posts as Content Type allows you to select a page/post (Existing posts/ pages) or category to display the title, featured image, and content of that selected post/page for the Service Section.
- Content Type: This setting allows you to select the kind of content to choose from. It contains select options (Pages, And Post) which allow the user to select a page/post to display in the Service Section.
- Button label: This setting allows the user to set the button label for the Section.
- Button Link: This setting sets the Link for the button.
Associate Section
In this section, you can customize the Associate Section.
- To configure the Associate Section, you need to navigate from Admin Panel > Appearance > Customize > Front Page Options > Associate Section.
- In this section panel, you can enable the section to display the Associate Section on the homepage, Disable it to hide the section on the homepage. After enabling the Associate Section, you can see the following options:
- Number of Logos: This setting allows the user to set the number of logos to display in the Associate section.
- Logo: This setting allows the user to set the logo for the Associate Section.

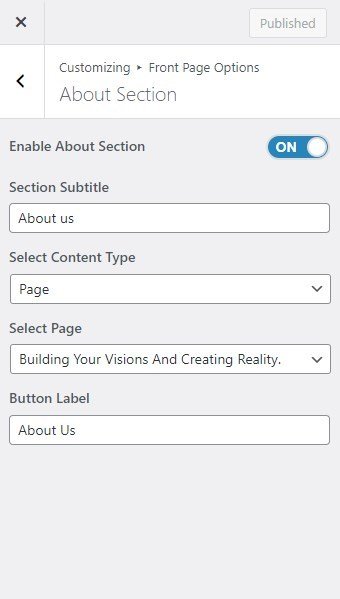
About Section
In this section, you can Customize the about section.
- To configure the About section, you need to navigate from Admin Panel > Appearance > Customize > Front Page Options> About Section.
- In this section panel, you can Enable/Disable the about section to Display/Hide the About section on the home page. After enabling the About section, the user will see the following options:
- Section Subtitle: This setting allows the user to set the subtitle for the About Section.
- Select a content type: You can select a page or post to display in the About section.
- Content Type: This setting allows you to select the kind of content to choose from. It contains select options (Pages, and Post) which allow the user to select a page/post to display for the About section
- Selecting Page/Post as Content Type allows you to select a page/post (Existing posts/ pages) to display the title, featured image, and content of that selected post/page for the About Section.
- Content Type: This setting allows you to select the kind of content to choose from. It contains select options (Pages, and Post) which allow the user to select a page/post to display for the About section
- Button Label: This setting allows the user to set the label for the button.
Project Section
In this section, you can set/ customize the Project section.
- To configure the Project section, you need to navigate from Admin Panel > Appearance > Customize > Front Page Options > Project Section.
- In this section panel, you can enable/Disable the Project section to display/Hide the Project Section. After enabling the Project section, the user will see the following options:
- Section Title: This setting allows the user to set the title for the Project Section.
- Section Text: This setting allows the user to set the text for the Project Section.
- Number of Posts to show: This setting will include the number of posts/ pages to display.
- Select a content type: In this setting, you can select a page or post for the Project section.
- Content Type: This setting allows you to select the kind of content to choose from. It contains select options (Pages, and Post) which allow the user to select a page/post/ Category to display for the Project section.
- Selecting Pages/Posts as Content Type allows you to select a page/post (Existing posts/ pages)/ Category to display the title, featured image, and content of that selected post/page for the Project Section.
- Content Type: This setting allows you to select the kind of content to choose from. It contains select options (Pages, and Post) which allow the user to select a page/post/ Category to display for the Project section.
- Button Label: This setting allows the user to set the button label for the Section
- Button Link: This setting sets the Link for the button.

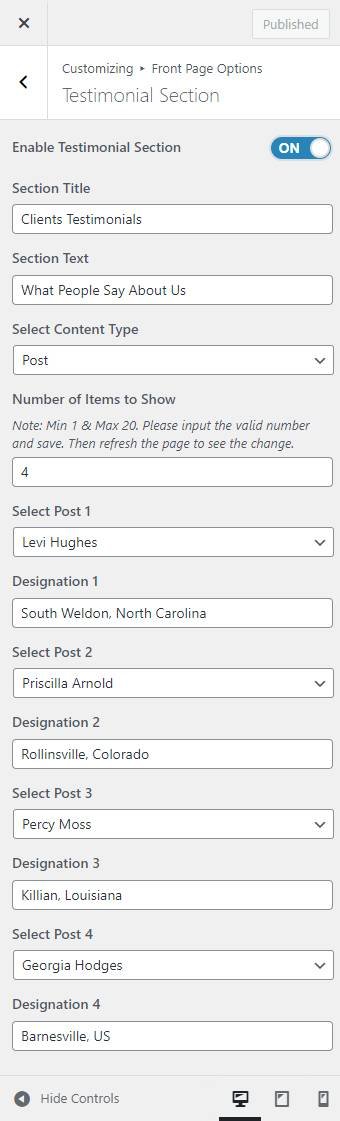
Testimonial Section
In this section, you can set/ customize the Testimonial section.
- To configure the Testimonial Section, you need to navigate from Admin Panel > Appearance > Customize > Front Page Options > Testimonial Section.
- In this section panel, you can enable/Disable the Testimonial section to display/Hide the Testimonial Section. After enabling the Testimonial Section, the user will see the following options:
- Section Title: This setting allows the user to set the title for the Testimonial Section.
- Section Text: This setting allows the user to set the section Text for the Testimonial Section.
- Number of items to show: This setting will include the number of posts/ pages to display. Note: Min 1 & Max 12. Please input the valid number and save it. Then refresh the page to see the change.
- Select a content type: page or post for the Testimonial Section.
- Content Type: This setting allows you to select the kind of content to choose from. It contains select options (Pages, and Post) which allow the user to select a page/post to display in the Testimonial Section.
- Selecting Pages/Posts as Content Type allows you to select a page/post (Existing posts/ pages) to display the title, featured image, and content of that selected post/page for the Testimonial Section. *After selecting the content type as pages/posts user needs to select the following:
- Content Type: This setting allows you to select the kind of content to choose from. It contains select options (Pages, and Post) which allow the user to select a page/post to display in the Testimonial Section.
- Select Designation: This setting allows the user to set the Designation of the clients.
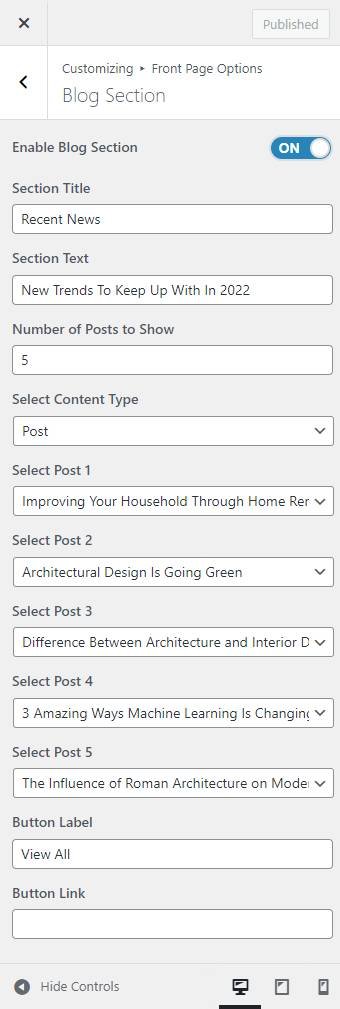
Blog Section
In this section, you can customize the Blog Section.
- To configure the Blog Section, you need to navigate from Admin Panel > Appearance > Customize > Front Page Options > Blog Section.
- In this section panel, you can enable the section to display the Blog section on the homepage, Disable the section to Hide the Blog section on the homepage. After enabling the Blog Section, the user will see the following options:
- Section Title: This setting allows the user to set the title for the section.
- Section Text: This setting allows the user to set the title for the section.
- Number of Posts to show: This setting will allow the user to set the number of posts to display.
- Select a content type: In this setting, you can select a page or post for the Blog Section.
- Content Type: This setting allows you to select the kind of content to choose from. It contains select options (Pages, Post, and Category) which allow the user to select a page/post to display in the Blog Section.
- Selecting Pages/Posts/Category as Content Type allows you to select a page/post (Existing posts/ pages) or category to display to get the content of that selected post/page for the Blog Section.
- Content Type: This setting allows you to select the kind of content to choose from. It contains select options (Pages, Post, and Category) which allow the user to select a page/post to display in the Blog Section.
- Button label: This setting allows the user to set the button label for the Section.
- Button Link: This setting sets the Link for the button.
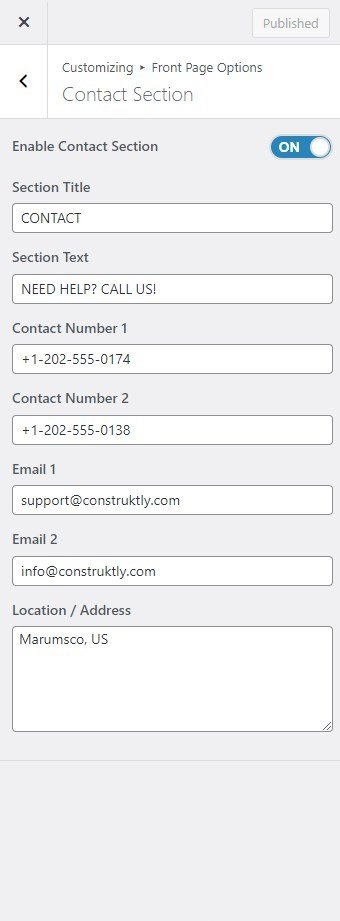
Contact Section
In this section, you can set/ customize the Contact Section.
- To configure the Contact Section, you need to go to Admin Panel > Appearance > Customize > Front Page Options > Contact Section.
- In this section panel, you can Enable/Disable the Contact Section to Display/Fide the Contact Section. After enabling the Contact Section, the user can see the following options:
- Section Title: This setting allows the user to set the title for the Contact Section.
- Section Text: This setting allows you to set the content for the Contact Section
- Contact Number 1: This setting allows you to set the phone number for the Contact Section.
- Contact Number 2: This setting allows you to set an alternate phone number.
- Email Label: This setting allows you to set the Label for the Email Address.
- Email 1: This setting allows you to set the Email address for the Contact Section.
- Email 2: This setting allows you to set the alternate Email address for the Contact Section.
- Location/Address: In this setting, you can set the Location.